Free Crochet Basket Pattern: Easy Sturdy Storage Project
This heavy cotton basket holds its shape even when packed with clunky tools or tangled yarn scraps. Making your own storage is a quiet way to tidy a messy desk or shelf in just an afternoon. Beginners find this project rewarding because the thermal stitch creates a thick, double-layered wall that feels substantial and firm in your hands. You will learn to manipulate basic single crochet loops to achieve a dense, professional finish that stands upright without any stiffening agents. Whether you need a place for mail or a home for small accessories, this practical piece brings order to any surface.
Why You’ll Love This Pattern
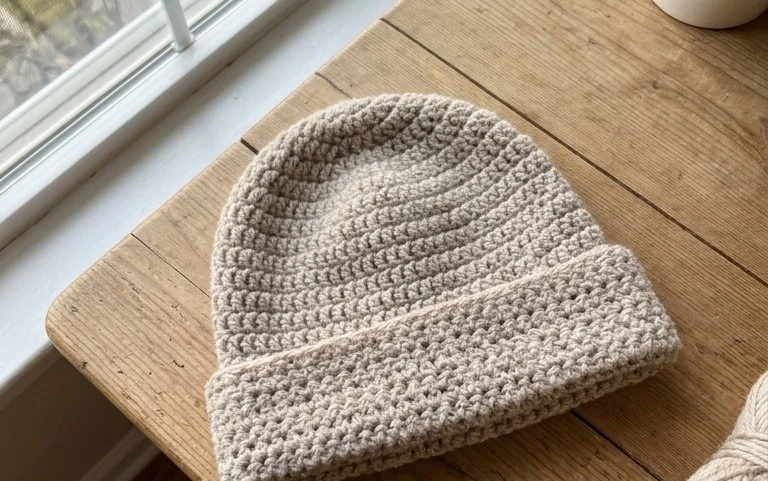
The Classic Crochet Storage Basket is a functional home essential that transforms tangled yarn scraps and loose office supplies into organized decor. Using a thick, heavy-weight yarn and a smaller-than-recommended hook creates a stiff fabric that stands upright on its own without needing internal stiffeners. This project relies on the thermal stitch, a variation of single crochet that produces a dense, double-layered thickness. It works up in a single afternoon, making it a reliable choice for last-minute housewarming gifts or quick organizing solutions. The minimalist design fits seamlessly into any room, from the nursery to the home office.
I finally found a basket pattern that does not slouch over when I fill it with my heavy knitting needles. It feels incredibly sturdy and the texture is dense enough that you cannot see the surface it sits on through the stitches.
— Sarah, home organizer
Pattern Overview & Skill Level
- Skill Level: Advanced Beginner
- Approximate Time: 3 to 4 hours
- Construction: Worked in continuous rounds from a flat circular base upward, ending with a reinforced edge.
- Finished Dimensions: 8 inches diameter, 6 inches height.
Materials & Supplies Needed
- Yarn: Super Bulky weight (#6), cotton or cotton-blend cord, approximately 200 yards.
- Hook Size: 8.0 mm (L-11).
- Notions: Stitch marker to track the start of rounds, tapestry needle for weaving ends, scissors.
- Yarn Substitutions: You may use two strands of Worsted weight (#4) cotton held together as a substitute. Using a wool blend will result in a softer basket, while 100% cotton cord offers the most structural rigidity.
Stitch Guide & Abbreviations (US Terms)
- MR: Magic Ring.
- sc: Single crochet. Insert hook, yarn over, pull up a loop, yarn over, pull through both loops on hook.
- inc: Increase. Work 2 sc in the same stitch.
- sl st: Slip stitch. Insert hook, yarn over, pull through stitch and loop on hook.
- BLO: Back loop only. Work stitches into the loop furthest from you.
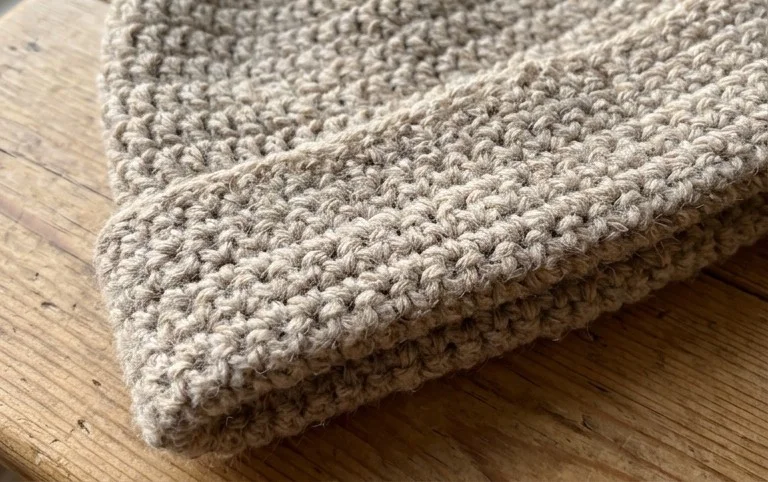
- Thermal st: Insert hook into the back loop of the current stitch AND the unused front loop from the row below. Yarn over and pull up a loop, then complete as a normal sc.
Step-by-Step Pattern Instructions
Basket Base
- Rnd 1: Start 6 sc into a MR. (6 sts)
- Rnd 2: Inc in each st around. (12 sts)
- Rnd 3: [Inc, 1 sc] repeat 6 times. (18 sts)
- Rnd 4: [Inc, 2 sc] repeat 6 times. (24 sts)
- Rnd 5: [Inc, 3 sc] repeat 6 times. (30 sts)
- Rnd 6: [Inc, 4 sc] repeat 6 times. (36 sts)
- Rnd 7: [Inc, 5 sc] repeat 6 times. (42 sts)
- Rnd 8: [Inc, 6 sc] repeat 6 times. (48 sts)
Basket Sides
- Rnd 9: Working in BLO, sc in each st around. (48 sts)
- Rnd 10: Work in standard sc in each st around. (48 sts)
- Rnds 11–20: Work in Thermal st in each st around. This builds the height of the basket walls. (48 sts each round)
- Rnd 21: Sc in each st around. Join with a sl st to the first stitch of the round. Fasten off and weave in ends securely. (48 sts)
Care & Washing Instructions
- Spot clean small spills with a damp cloth and mild soap.
- If a full wash is required, machine wash on a delicate cycle in cold water using a mesh laundry bag.
- Reshape the basket while damp and allow it to air dry completely on a flat surface to maintain its circular base.
Pro Tips & Common Mistakes to Avoid
Maintain consistent tension throughout the sides of the basket to ensure it stands straight. If your tension loosens as you work, the basket will appear wider at the top than at the bottom. Use a stitch marker at the start of every round to avoid losing your place, as the thermal stitch can hide the stitch definition. To weave in ends, use a tapestry needle to pull the tail through the center of several stitches in the base rather than simply cutting it short, which prevents the yarn from unraveling. If you wish to make the basket larger, increase the diameter of the base by adding more rounds, though be aware this will require significantly more yardage.
Frequently Asked Questions
Can I use acrylic yarn instead of cotton?
Acrylic yarn is softer and stretchier than cotton. While you can use it, the basket will likely be less stiff and may slump when items are placed inside. If you use acrylic, consider using a hook one size smaller to compensate for the stretch.
Is this pattern suitable for a total beginner?
If you understand the basics of single crochet and working in a magic ring, you can complete this project. The thermal stitch requires attention to detail regarding where to insert your hook, but the repeat is very straightforward once you establish the pattern.
Can I sell the baskets I make from this pattern?
Yes, you are welcome to sell finished items created from this pattern. I ask that you credit the designer by including a link back to this tutorial in your online shop listings.
How do I adjust the height of the basket?
You can easily adjust the height by adding or removing rounds of the thermal stitch before you reach the final fastening-off round. Keep in mind that a taller basket may lose some of its structural stability.
Your new crochet basket now provides a sturdy home for your clutter, proving that simple materials make the best organizers. If you want to experiment, try using two contrasting colors of yarn to create a bold stripe along the base or size up your hook for a slouchier, softer look. Take a picture of your finished work and share it with our community on social media. For more home projects using these same techniques, feel free to browse the rest of the collection on the blog.