Easy Crochet Christmas Tree Ornaments: Free Pattern
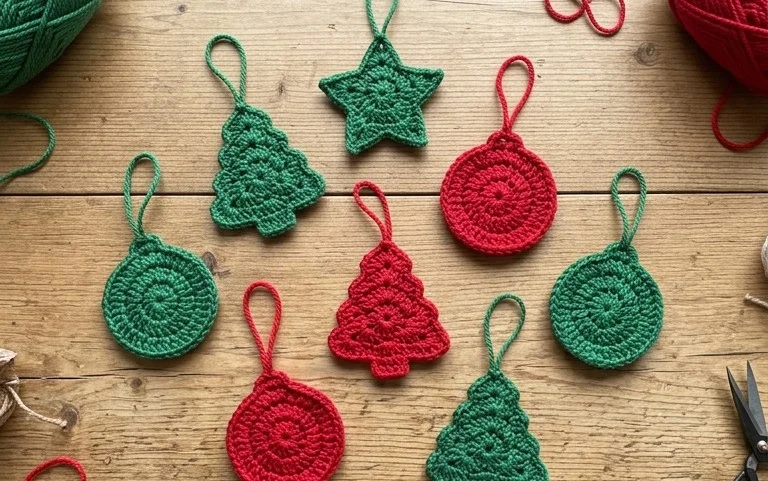
These miniature trees have a firm, squishy texture that stands up beautifully on a shelf or hangs securely from a holiday pine branch. Working with cotton yarn creates tight stitches that prevent the stuffing from peeking through, giving you a polished result every time. This project is a great way for beginners to practice working in continuous rounds without needing to count complex rows. You will spend your afternoon mastering the magic ring technique and simple increases. Whether you are building a full forest for your mantle or stitching a quick gift, this ornament comes together in one sitting.
Why Crocheters Love It
This beginner-friendly project works up quickly, making it a satisfying choice for those who need a gift in an afternoon. Because the pattern uses simple stitches and a repetitive structure, it is easy to memorize while watching television or listening to an audiobook. The dense fabric created by the single crochet construction provides a clean, professional finish that holds its shape well over time. Using worsted weight yarn means you can likely find colors that match a recipient’s favorite aesthetic in your existing scrap yarn bin.
I managed to finish this project in one evening and the instructions were clear enough that I did not have to restart once. The finished size is perfect for my needs.
— Sarah, hobbyist crocheter
Pattern Overview & Skill Level
- Skill Level: Beginner
- Approximate Time: 2 to 3 hours
- Construction: Amigurumi-style continuous rounds using a magic ring for a seamless base
- Finished Dimensions & Sizing: 4 inches tall by 3 inches wide
Materials & Supplies Needed
- Yarn: Worsted weight (#4), 100% cotton, approximately 50 yards in your chosen primary color
- Hook Size: 4.0 mm (US G-6)
- Notions: Tapestry needle, locking stitch markers, polyester fiberfill stuffing, and a pair of 8mm plastic safety eyes
- Safe yarn substitutions: Acrylic yarn of the same weight will produce a slightly softer, more pliable finished item. If you choose a wool blend, ensure it is machine washable if the item is intended for a child.
Stitch Guide & Abbreviations (US Terms)
- MR: Magic Ring. A method of starting a project by working into an adjustable loop.
- ch: Chain.
- sc: Single crochet. Insert hook, yarn over, pull up a loop, yarn over, pull through both loops on hook.
- inc: Increase. Work 2 sc into the same stitch to add a stitch.
- dec: Decrease. Invisible decrease method: Insert hook into the front loop of the next two stitches, yarn over, pull through both front loops, yarn over, pull through remaining two loops.
- sl st: Slip stitch. Insert hook, yarn over, pull through stitch and loop on hook.
- st/sts: Stitch/stitches.
Step-by-Step Pattern Instructions
Body and Head
- Rnd 1: Start with a MR, work 6 sc into the ring. (6 sts)
- Rnd 2: Work 2 sc in each st around. (12 sts)
- Rnd 3: 1 sc, inc repeat from * to * 6 times. (18 sts)
- Rnd 4: 2 sc, inc repeat from * to * 6 times. (24 sts)
- Rnd 5: 3 sc, inc repeat from * to * 6 times. (30 sts)
- Rnds 6–12: Sc in each st around. (30 sts)
- Rnd 13: 3 sc, dec repeat from * to * 6 times. (24 sts)
- Rnd 14: 2 sc, dec repeat from * to * 6 times. (18 sts). Insert safety eyes between rounds 10 and 11, spaced 5 stitches apart. Begin adding fiberfill stuffing firmly.
- Rnd 15: 1 sc, dec repeat from * to * 6 times. (12 sts)
- Rnd 16: Dec 6 times. (6 sts)
Finishing
Cut the yarn leaving a 6-inch tail. Thread the tail through a tapestry needle and weave it through the front loops of the final 6 stitches. Pull tight to close the opening. Weave the remaining tail securely into the center of the piece to hide it.
Care & Washing Instructions
- Hand wash in cool water using a gentle detergent specifically formulated for knit and crochet items.
- Lay the piece flat on a clean towel and reshape it while damp to ensure it dries in the correct proportions.
- Avoid using a tumble dryer, as high heat can melt synthetic fibers or cause excessive shrinking in natural fibers.
Pro Tips & Common Mistakes to Avoid
Maintain consistent tension by holding your yarn with a steady grip throughout the entire project. Using a locking stitch marker at the start of every round is mandatory to prevent losing your place, as continuous rounds lack a clear seam. When weaving in your ends, travel through the interior of the piece in multiple directions to ensure the tail does not work its way out after washing. If you decide to use a thicker yarn weight, your finished size will increase, which will also require approximately 20% more yardage to complete the same stitch counts.
Frequently Asked Questions
Can I use a larger hook size for this pattern?
Using a larger hook will make the stitches looser, which allows the stuffing to show through. Stick to the recommended hook size to ensure the fabric remains tight and opaque.
Is it safe to give this to young children?
Safety eyes can pose a choking hazard. If making this for a child under three years old, embroider the eyes with black yarn instead of using plastic safety components.
How do I adjust the size of the project?
To make the item larger, add more increase rounds at the beginning, such as a round of 4 sc, inc. Remember that this will require you to adjust the straight rounds and the subsequent decrease rounds to match.
Am I allowed to sell the items I make from this pattern?
You may sell finished items made from this pattern, but you must credit the designer. Please do not sell or redistribute the pattern document itself.
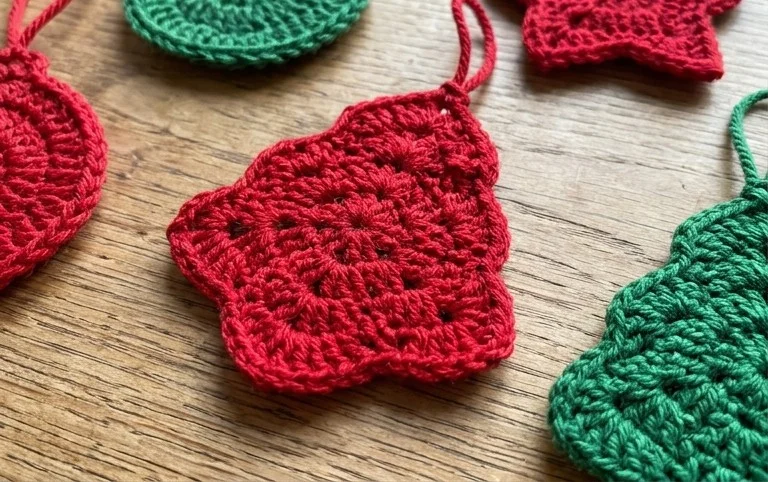
Seeing your handmade forest displayed on a wreath or mantle brings such a cozy feeling to the house during the winter months. Try using a metallic thread held alongside your main yarn if you want an extra touch of holiday shimmer on your branches. When your decoration is finished, I would love to see how your colors turned out on your favorite social media site. Please browse the rest of the blog for more free patterns to fill your holiday season with handmade charm.